| Welcome, Guest |
You have to register before you can post on our site.
|
| Online Users |
There are currently 33 online users.
» 0 Member(s) | 33 Guest(s)
|
| Latest Threads |
Shimming the rotor hub
Forum: Maintenance & Troubleshooting (162/A600)
Last Post: Homer Bell
5 hours ago
» Replies: 3
» Views: 86
|
162F for sale
Forum: Helicopters Marketplace
Last Post: Homer Bell
7 hours ago
» Replies: 7
» Views: 1,453
|
E36-8570 Talon Oil Temp S...
Forum: General Discussion
Last Post: Robin Scalzo
10-26-2026, 11:12 PM
» Replies: 0
» Views: 46
|
Fuel tank insulation
Forum: General Discussion
Last Post: Jared Hartzell
10-25-2026, 02:15 AM
» Replies: 6
» Views: 587
|
Pedals become stiff after...
Forum: Maintenance & Troubleshooting (162/A600)
Last Post: Homer Bell
10-23-2026, 12:22 PM
» Replies: 0
» Views: 72
|
tail rotor shaft drive in...
Forum: Modifications & Recommendations
Last Post: Graeme Smith
10-22-2026, 07:26 AM
» Replies: 33
» Views: 5,130
|
Grease Tool
Forum: General Discussion
Last Post: Lyle Swallows
10-22-2026, 04:54 AM
» Replies: 1
» Views: 123
|
I have a new rotorway MAI...
Forum: Helicopters Marketplace
Last Post: Homer Bell
10-19-2026, 12:24 AM
» Replies: 1
» Views: 219
|
162F spark plugs
Forum: General Discussion
Last Post: Lyle Swallows
10-01-2026, 02:46 AM
» Replies: 4
» Views: 795
|
The Digital Rotortach Sto...
Forum: Digilin LEDtechnics
Last Post: Lyle Swallows
09-27-2026, 07:58 PM
» Replies: 2
» Views: 292
|
|
|
| Fuel tank insulation |
|
Posted by: Paul Berg - 08-13-2026, 08:37 PM - Forum: General Discussion
- Replies (6)
|
 |
I know this comes up now and then, but I need to re-insulate my fuel tanks and am wondering what is the latest and greatest material people are using and what’s the source. Thanks
|

|
|
| Slider Ball Clamp slipped locking collective in up position in flight. |
|
Posted by: Orv Neisingh - 08-13-2026, 01:16 PM - Forum: Mechanical Failures and Accidents
- Replies (10)
|
|
Here is an area where I experienced a control lockup in flight was with the donut-shaped collar around the main rotor shaft under the non-rotating swash plate on the Rotorway helicopter. This collar must be secured to the main shaft by clamping pressure so that it cannot slide up or down. In this case I was with a student when the collective controls locked in the near full-up position. This happened in an area where the wind was high and gusting higher as my student was making an approach to the fuel tanks on his ranch. Controlling the helicopter, a Jet Exec non-factory configuration, in the gusty winds was requiring a lot of collective input when all at once the collective locked in the near-full up position. It is important to note that the jet engine equipped ships vary greatly from the design of the Rotorway helicopter and their reliability history should not be compared with that of a Rotorway built to factory specs.
The helicopter began to climb, and climb fast, with the powerful turbine engine powering it's rotor system. I emphatically called out to my student "I've got it", those special words that I reserve for the times when I need the student completely off of the helicopter's controls. I took the controls and tried to force the collective down but it would not move down at all. I then slightly decreased the throttle on the Jet Exec to achieve a main rotor RPM of around 92 percent but the helicopter continued to climb. I knew that eventually we would run out of power and stall the main rotor blades ending in our demise. I then remembered that rapid erratic cyclic inputs would severely dump lift so I began to move the cyclic control from stop to stop in all directions causing the helicopter to loose lift and settle to the ground where I was able to slide it on (it had the extended skid modification which one again prevented the helicopter from nosing over with forward ground contact).
A word of caution here, we were in a life and death situation and the only way that I could stop the rapid climb was to reduce the main rotor RPM to decrease the lift being produced along with very aggressive cyclic inputs. Doing this in flight and especially in a high rotor pitch angle climb is very risky and if the rotor RPM is allowed to decrease much below that point the main rotors will stall and the helicopter will fall like a rock. I had no choice and did what I needed to do to cause the helicopter to descend and slide onto the surface.
Upon investigating the cause of the lock-up we discovered the problem. My student had purchased a rolled over helicopter in Texas. He completely rebuilt it before I arrived. The torque on the nut securing the Slider Ball Clamp (collar) to the main rotor shaft had been checked by me when I arrived a the students home. The torque value on the NUT was correct but the collar still slipped down allowing the alignment forks to exit the top of the collar and rotate away from their slots in the collar. The forks now effectively blocked the collective control from moving the swashplate downward to lower the pitch on the main rotor blades.
Upon examination after the lockup we found that the clamping bolt had corroded threads. The bolt thread condition caused the nylock nut to achieve the proper torque, but before the nut was far enough onto the bolt to securely clamp the collar to the shaft. The person installing the collar must have used a defective bolt to secure it. I now gently but firmly pry down on the collar on every ship I apply downward pressure on the collar to insure that it has the proper clamping pressure so that it will not move. I also check the torque on both the nut and the bolt head to insure that both are at the proper setting to achieve the required clamping force on the collar.
The photo below was taken after we landed. You can clearly see the forks sitting out of their slots and resting on top of the collar which prevents them from being able to be lowered.
=100% =100%After we re-positioned and secured the collar above and completed Ron's flight instruction, I headed to Pennsylvania to provide another student with advanced flight training. I was performing an airworthiness inspection on this student's Rotorway Exec 90 when I noticed the collar position looked too low. When I pulled full up-collective the fork came completely out of the collar. We checked the torque settings and they were incorrect for the nut and bolt head, they were loose.
This student had been flying it that way at altitude and if he had ever been put into the position of applying full up-collective the fork would have come out of the guide slots and rotated away from them. This would again have jammed the collective in the full-pitch position. Had that happened it could have ended up in an unhappy ending! Everyone should check the position and security of this collar. That was the second collar issue found in 2 weeks. The photo below was taken before we slid this second collar back into position and properly torquing the clamping bolt.
=100% =100%This method of securing the collar to the main shaft is very effective but the installation must be done to the factory standards. It is the responsibility of the owner/builder to check the integrity of the clampinb bolt to insure proper securring of the collar to prevent it from moving.  The photo above shows a properly placed collar and this builder also fabricated a reinforced collective scissor bracket. I have seen this bracket break in the past. The break occured at the 90 degree bend and is most likely from improper technique used in bending the bracket ears performed by the builder. Those bends should be radiused as per the factory drawings. The following week I was off to Connecticut and of course now the first thing on this students ship that I checked was his locking collar. When I applied downward pressure on the collar with a piece of wood and a fulcrum the collar slipped down easily. We checked the torque on the nut and it turned and turned and turned but would not tighten. It took us nearly an hour to get the locknut with stripped threads off the bolt and as you can clearly see in the photo below the installer had used a bolt that was the next size longer than called for in the factory specs.
When the nut was tightened it ran out of threads and rode up onto the shank of the bolt stripping the nut's threads. With the threads stripped the collar could not apply the required clamping force onto the main rotor shaft. It could have eventually slid down to the point that the forks could clear the collar, rotate, and jam the collective in the full up-collective position.
 I urge everyone to check their collars prior to flight. This series of loose collars is not common because I have only found one loose clamping ring since.
|
|
|
|
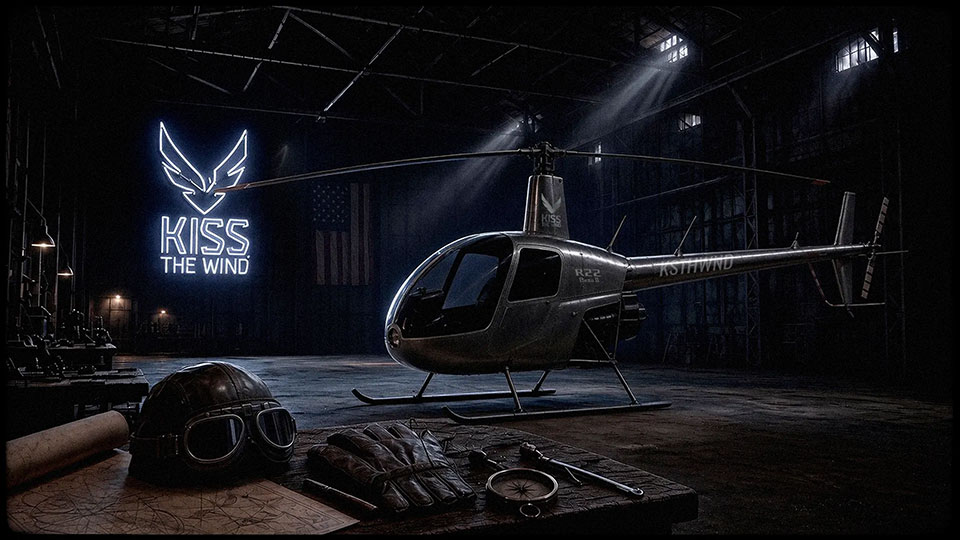
| KISS THE WIND Introduction |
|
Posted by: Christopher Kiss - 08-13-2026, 04:48 AM - Forum: Flight Training
- Replies (3)
|
 |
Greetings Rotorway Forums.
Very honored Orville (Neisingh) encouraged me to join. We first met and spoke at church and introduced ourselves over a mutual flight review in the R22 BETA II. Thrilled to learn he also owned an R22 some years ago, and it blew my hair back when I saw his hanger of Rotorways... so I indicated huge interest in having a transition. He has been most generous with his mentoring.
Came to Missouri from Los Angeles last year to train a few pilots at various levels, and was invited to stay to train another in particular. This led to another student or three, and so I recently based myself with an R22 out of West Plains traveling when required to surrounding areas... Mountain View, Springfield, Willow Springs, Salem, Branson and Hollister etc.
Also believe there's no such thing as too much ground, so I place strong emphasis on the knowledge -- occasionally preparing students for IPCs, written tests, checkrides and flight reviews - including SFAR 73 ground training for Robinson R22 & R44.
I consider it a great honor and enormous motivator to help people get their wings.
Feel free to contact anytime for an intro flight or conversation.
Very big thanks, and I very much look forward to the sources of insight and information here.
Fly safe. Have fun.
- Christopher Kiss | Helicopter CFII
+ Commercial Single & Multi-Engine Airplane + IFR
+ Advanced & Instrument Ground Instructor (AGI & IGI)
+ Unmanned Aircraft (Drone)
EMAIL: hello@kiss.co
PHONE: 1-888-505-KISS (5477)
RATES
Accomodate your schedule, location and convenience as much as possible. Also offer 2ND floor private accommodations near KUNO airport if you prefer to travel and overnight for concentrated training effort over several days. Kitchen, laundry, coffee, the works.
R22 BETA II - $380/HR All fuel and instruction inclusive.
( Lower time-building rates occasionally available on ferry, cross-country maintenance runs. )
GROUND & PREPARATION: $60/HR (Private and Commercial) or $80/HR (Instrument & CFI)
IPC / FLIGHT REVIEWS + SFAR 73: Includes 1HR GROUND + 1HR FLIGHT
TRAVELING FLIGHT INSTRUCTION Typically range $800-$1250 per day plus expenses.
Contact for arrangements to bring aircraft to your area in MO.
|
|
|
|
| Fuel exhaustion fatality. |
|
Posted by: Orv Neisingh - 08-12-2026, 12:27 PM - Forum: Mechanical Failures and Accidents
- Replies (1)
|
|
This was not a Rotorway but it is a great lesson for all of us to be proficient and comfortable initiating an auto and managing our fuel.
4 people died because a pilot was texting instead of checking fuel. This one is hard to read.
The helicopter was a Eurocopter AS350 B2, call sign N352LN, operated by Air Methods Corporation as an EMS flight under Part 135. The crew was a pilot, flight nurse, and flight paramedic. They had a patient on board.
The flight originated from Harrison County Community Hospital in Bethany, Missouri around 1811. The plan was straightforward: fly to the Midwest National Air Center in Mosby, Missouri to refuel, then continue 7 nautical miles to Liberty Hospital to deliver the patient.
The pilot knew fuel was critically low before the first departure. He knew it again before the second.
He departed anyway. Both times.
The NTSB found that the pilot was texting during safety-critical ground and flight operations. Not glancing at a phone. Texting. During preflight. During operations where a fuel check should have been non-negotiable.
He also carried fatigue into that cockpit.
At approximately 1841, 30 minutes after departure from Bethany, the engine lost power. Fuel exhaustion. The pilot attempted to enter an autorotation, but he did not successfully complete it. The helicopter impacted the ground near GPH.
The pilot, flight nurse, flight paramedic, and patient were all killed.
The NTSB later noted that the pilot's autorotation training in the AS350 B2 had not included practice representative of an actual engine failure at cruise airspeed. That gap mattered in the last seconds.
There was no operational policy requiring the pilot to notify the control center about an abnormal fuel situation. No backstop. No one on the ground who could have interrupted what was unfolding.
━━━━━━━━━━━━━━━━━━━━━━━━━━
NTSB Probable Cause: The pilot's failure to confirm that the helicopter had adequate fuel on board to complete the mission before making the first departure, his improper decision to continue the mission and make a second departure after he became aware of a critically low fuel level, and his failure to successfully enter an autorotation when the engine lost power due to fuel exhaustion. Contributing to the accident were (1) the pilot's distracted attention due to personal texting during safety-critical ground and flight operations, (2) his degraded performance due to fatigue, (3) the operator's lack of a policy requiring that an operational control center specialist be notified of abnormal fuel situations, and (4) the lack of practice representative of an actual engine failure at cruise airspeed in the pilot's autorotation training in the accident make and model helicopter.
━━━━━━━━━━━━━━━━━━━━━━━━━━
Fuel state is not a suggestion to check when convenient. Check it before departure, confirm it before every subsequent departure, and if the number is wrong, you don't fly until it isn't.
📋 August 26, 2011 · Eurocopter AS350 B2 · N352LN · 4 fatal
#PilotDebrief #FuelManagement #EMSAviation
|
|
|
|
| Redundency |
|
Posted by: Orv Neisingh - 08-09-2026, 06:17 PM - Forum: General Discussion
- Replies (1)
|
|
Redundancy
Most of us have flown on commercial airliners and have noticed that all of them have at least two engines. These aircraft are designed in such a way that should one engine fail, the other engine would be able to get the aircraft to a safe landing. Many of the larger helicopters also have more than one engine both for power and safety. Our little helicopters do not have the luxury of twin engines for safety so we must insure that the systems that have been designed to keep our one engine running smoothly, even in the event of a fuel pump, ignition, fuel injection system, or computer failure. Rotorway has included backup systems for these critical systems but many of us have been flying these machines with a fatal flaw that can take out all primary and back up systems simultaneously. WILL YOUR HELICOPTER BE NEXT? Now don’t panic, there is a simple fix to this problem and I wanted to get the word out to all Rotorway owners that without this fix, they may be next, complete engine shutdowns have happened twice that I know of in just the past 12 months.
Over the years of my involvement with Rotorway helicopters I have experienced a number of component failures. As I look back on each of these failures, the majority of them could have been prevented either by improved maintenance procedures or by carefully looking at the design of each system on the helicopter. A big factor in preventing failures is to have as thorough an understanding of your helicopter’s systems as possible and that is the primary reason that I take the time to write these articles. My goal is to pass along the knowledge and experience that I have gained from flying literally hundreds of different experimental and certified helicopters over the years including the two Rotorway helicopters and one Ultrasport 496 that I have personally built and flown.
My helicopter experience began with the purchase of a basic Exec152 that came standard with an automotive-style distributor that ran off a little wimpy V belt that was about 1/8” wide. We called it a sewing machine timing belt at the time and that is most likely what it’s origin was. This system never impressed me as being reliable and eventually supported that suspicion by failing resulting in an autorotation to the ground.
Back then those of us who were builders mostly networked by phone calls and group meetings since we did not have the internet with which we could network and share our ideas. The Rotorway factory did not encourage builders to interact with each other and often builders in close proximity to each other were unaware that there were other builders nearby. Through clubs like the Sierra Rotorcraft club that many of us belonged to we were able to compare notes, meet other builders, and encourage those that were in the building process.
The main problem that we all were concerned about was that the ignition system did not have any backup system. If any part of that system failed, the engine would shut down. Some folks figured a way to install dual electronic ignition with a set of diodes both firing the same set of spark plugs. The heads only had one plug per cylinder and I know of at least one builder who filled in the spark plug hole and then drilled and tapped in a dual set to allow for the redundancy of dual plugs.
My very first auto occurred on April 29th of 1993 while providing autorotation training to a student pilot Dan VanDuesen who was getting ready to take his check ride at the Rotorway factory. We had completed several practice autos and were climbing through 250 feet AGL heading for 500 feet AGL for another one when the engine quit. Dan was on the controls and I realized quite quickly the benefit of the flight instructor keeping his hands on all controls at all times. Dan was not fast enough to react on the controls for me so I immediately lowered the collective into the pocket and began a turn into the wind. We later discussed the incident and decided that we both lowered the collective at the same time. The lowering of the collective actually took place in less than a second from the time the engine quit so it was understandable that both of us would not wait for the other to drop the collective.
I had received autorotation training from several flight instructors by this time and practiced power recovery autos most times that I flew. In what seemed to be only about 5 seconds but was actually more like 10 we were sitting on the ground realizing that we were still upright and the helicopter was intact. When we got out to inspect the helicopter we found that the tail rotor end cap was polished and there was a small rock directly behind the little Scorpion that had a streak of aluminum on its surface.
Further investigation showed that the single coil on this single ignition engine had failed resulting in a complete engine shut down. If this helicopter had been equipped with a dual ignition system, this failure would not have resulted in the engine quitting. While I hiked the 3 miles back to my hangar to take the coil out of my Exec152, Dan used his permanent marker to memorialize that momentous event. I now have a rock that sits on my desk to this day as a reminder that things can and will go wrong with these helicopters but with proper training and good judgment, we can get through them in one piece.
Since that first auto in 1993, I have had to do several more in Rotorway helicopters. Each one was a learning experience and looking back on each one, the failures that precipitated those autos could have been avoided had I known what to look for.
One of those failures was caused by an old fuel pump. This one was at least 10 years old and should have been replaced. This Exec had redundant fuel pumps but one of them failed in a manner that I had not anticipated. Over time the “O” ring that sealed the two components of one of the pumps had deteriorated and cracked to the point that all at once while I was out flying I was engulfed in fuel vapors and mist and could not even breathe. All I could think about was those fuel vapors finding their way to the sparking points of the distributor and the entire helicopter exploding into a ball of flame.
Fortunately I was able to hold my breath and auto the helicopter safely to the ground and shut down all electrical before a fire was able to start. I was sure that I was going to be the first person arriving at the scene of the accident and that I would beat the paramedics there by at least 15 minutes. Once the helicopter was firmly on the ground I bailed out and ran but thankfully no fire ensued. It is important to remember that components age with exposure to the elements, including the air that they are in. A component like a drive belt or water hose can age prior to being installed onto the helicopter and may need replacing if your kit is of the older vintage.
I have always thought that the 162F wiring was redundant as it comes from the factory and is installed on the helicopter. About a week after providing flight training to one of my students he called to tell me that he had experienced a complete system shut-down while flying his 162F. He did an auto and the only damage was a couple of bent skids. The cause of the problem was a solitary short in a wire that shorted out against the fuel pump inertia switch bracket. As you can see from the photo, the wire rubbed on the bracket until the insulation was rubbed through and the short occurred. The owner cut out the damaged section and then soldered the wire together followed by properly insulating the repair. On my next visit to the student’s location we removed the wiring bundle and then rewired and secured the wiring to prevent a future short, as shown in the following photo. I had a difficult time believing that a single short in the electrical system would actually shut down all of the helicopters systems at the same time, after all, we had full redundancy for all critical systems didn’t we?
While I was providing flight training in another student’s 162F recently, we had a very unexpected failure of the helicopters electrical system.
This student had built an elevated helipad that was around 5 feet higher than the surrounding terrain so we would lift into a hover and then execute a max performance take off to attain ETL (effective translational lift) as quickly as possible so that we would not settle toward the high weeds surrounding the helipad. On one of our lift-offs all at once the engine quit, and the helicopter settled back onto the helipad. In the deafening silence we immediately noticed that both FADEC displays were off, all warning lights were off, the fuel pumps had shut off, and both ignition systems had quit.
This was not only very puzzling but maddening as well. I had, up until this time, felt that the 162F electrical system provided for true redundancy of all critical systems that keep the helicopter running. Isn’t that what we check during our run-up? We fault FADEC one system by turning off the FADEC 1 toggle and the back-up system, FADEC two, takes over the engine operation tasks. We turn off one fuel pump and the other fuel pump maintains adequate fuel pressure and keeps the engine running. There are two ignition systems providing independent spark for the dual plugs on each cylinder so if one system were to fail the other ignition system would be there keeping the engine running,,,, right?
I remembered that my student Joe had experienced the same problem in his 162F and that it was caused by a short in a single electrical wire, could this most recent failure have been caused by the same type of short?
What could cause both FADEC systems to simultaneously shut down at the same time that both fuel pumps quit working and both ignition systems stopped firing? What happened to the redundant back up systems that are always there giving us such a warm and fuzzy sense of security? In both of these incidents, all primary and backup systems quit simultaneously causing complete and instant engine stoppage.
Obviously something very major had happened and if it had happened 20 seconds later, you would most likely have been reading about a crash and rollover involving this flight instructor instead of this article warning you of the potential danger. Fran and I pulled the helicopter back into the hanger and began taking it apart. We first removed all of the access panels so that we could get a good look at everything. The overhead panel has 10 fuses that come pre-wired as a unit from the factory. It was apparent that two of the three 30 amp battery fuses had blown.
How could that happen? These fuses are supplied with power from the battery on one side and then the other side sends power to the ignitions and the FADECS as well as the fuel pumps. Investigating further we found that the 30 amp fuse on the single wire that comes from the alternator, is routed along the passenger side frame and then up to the battery switch in the overhead panel was also blown. With all three fuses blowing at one time, this shut off all power to the FADECS, the fuel pumps, and the ignition systems. There actually was a degree of redundancy but no independence from one system to the next.
If you look at the diagram (posted under HINTS AND TIPS) you can see that the factory has wired the fuses and switches so that power from the battery fuse 1 comes from the battery, through the 30 amp fuse, hooks up with the 30 amp lead from the alternator and then supplies electrical power to Ignition 2, Ignition 1, FADEC 2, and then FADEC 1 before daisy chaining back up to the second 30 amp battery fuse. These critical systems and not independently wired at all but are all wired together in such a manner that allowed one electrical short circuit to take them all out at the same time. These two incidents that I am referring to are just the two that I am aware of. Were there others that caused complete engine shut downs where the cause was never discovered?
There is a photo of the overhead fuse panel as viewed from the top side under HINTS AND TIP on this forum. The wires with the red marking are the ones that are feeding all of the engine systems as outlined in the diagram above. After the photo was taken, we rewired the panel to separate the primary systems power from that of the back up system with no interconnection between the two.
We found the precipitating cause of the trouble to be one of the fuel tank supports. I have seen a number of different ways of attaching the fuel tanks on the exec 90 and 162F. The factory plans call for fabricating clamps that wrap around the frame and then attach to the tank straps with bolts.
There is a photo in HINTS and TIPS that shows how the wrap around fuel tank support strap has slid down the frame over a period of 20 hours. I drew a line on the frame where the strap was originally and the arrow shows where the tank slid causing the tank and tank strap to settle approximately one inch,
In many of the 162Fs that I have flown the builder has opted to weld fuel tank support brackets to the frame that the tank straps bolt onto. The wisdom of using the welded brackets is that the fuel tanks cannot slip down the frames as they can when using only wrap around straps.
In the case of this second failure, the builder used the factory method of securing the tank straps to the frame with wrap-around clamps.
With time and the weight of full fuel, the tank on the passenger side had settled enough that the tank strap crushed the 30 amp feed wire that runs from the alternator to the overhead panel. This wire then shorted out to the tank strap blowing all three fuses that powered all engine systems.
If your Rotorway Exec 90 or 162F has the factory supplied wiring installed then you most likely do not have the redundancy that you thought. To date I have helped the owners of several 162F and Exec 90’s to rewire those critical systems to allow for true redundancy.
We then separated the wires feeding the critical components as follows. One 30 amp circuit that runs from the alternator ties into one 30 amp battery fuse, then FADEC 1 and Ignition 1. The other 30 amp battery fuse powers the backup system. Now if a short circuit occurs in one of these systems, it will blow the fuses or pop the breakers of the associated FADEC and ignition without taking out the backup systems. Now we have true redundancy of these critical systems and can fly with a greater degree of reliability.
I would encourage everyone that has one of these helicopters to trace out your wires and insure that you have true redundancy and not just a false sense of security.
Fly safe and enjoy your these amazing machines.
|
|
|
|
| Tail rotor shaft break |
|
Posted by: Orv Neisingh - 08-08-2026, 12:15 PM - Forum: Mechanical Failures and Accidents
- Replies (3)
|
|
Many years ago I was hired to provide flight instruction in an Exec 90 at the Torrance, CA airport. This is the same airport where the Robinson factory is located. As you can imagine, this is a very busy airport with lots of R22 and R44 test flights being conducted on new aircraft prior to delivery.
The new owner of this Exec 90 owned a jet charter service and was an accomplished pilot. He purchased the Exec 90 to see if he had the aptitude to learn to fly helicopters before investing in a certified ship. He was the third owner and the logbooks indicated that only scheduled maintenance had been performed on this helicopter with no damage history indicated. I did notice that the tail rotor blades looked like they had been recently painted due to the lack of paint chipping on the leading edges. This should have raised some concern but at that time it did not register as anything to investigate..big mistake on my part.
We were able to find a hover area away from all of the Robinson traffic and conducted his hover training which he picked up on quickly. After several days of hover training, it was time to take the helicopter to altitude but the traffic pattern was very congested for initial flight training so we elected to fly out to the coast and then fly south to Long Beach where there was less congestion. The flight out to the coast was over very heavily congested residential and commercial development so once we reached the coast and open beaches I relaxed a little.
The first day we flew down the coast to Long Beach and practiced traffic patterns over the Long Beach container port where there was a lot of open space in case we needed to land in an emergency. We made several trips down to Long beach that day with returns to Torrance to refuel.
The next day we planned to repeat our route for more altitude training so we again flew over all of the developed congestion between Torrance and the coast then turned left to follow the coast line south. We could see a large fog bank about a mile off the shore line and saw a few wisps of fog drifting toward the beach area. We decided that if the fog came in (it was not predicted to come in) we could be stuck in Long Beach and not able to return to Torrance so we executed a 180 degree turn and returned to his home airport.
We made our radio calls and made our approach to the taxiway and set down at Torrance. As we rolled the throttle back to idle to talk, I heard a distinctive tic.tick.tic from the tail rotor area of the helicopter. I told my student to shut the engine down as I got out to investigate the origin of the ticking noise. As I was standing next to the winding down tail rotor it suddenly wobbled dramatically and the entire tail rotor assembly from the pulley outward fell off and was just hanging by the anti-torque cable.
Had that happened anywhere else in our flight we would have been in real trouble, God had protected us to have it happen once we were safe on the ground. In the hangar we pulled the remaining portion of the tail rotor shaft out and found that someone had previously drilled a second set of holes in the tail rotor shaft for the tail rotor pulley bolt. The tail rotor shaft now had four holes instead of the two for the pulley bolt.
The two bolt holes that were not being used by the bolt were oblong from an obvious sudden stop like a tail rotor strike. A crack had propagated unseen under the pulley and traveled the weakest route, from hole to hole until the shaft just broke free. Finding this we called the Rotorway factory and inquired about any tail rotor parts sold to the previous owner. They confirmed that they had recently shipped a new set of tail rotor blades and pitch pins to the previous owner due to a ground strike which destroyed both tail rotor blades and bent the pitch pins on both blades.
The previous owner had replaced the blades and pitch pins, had seen the oblong holes in the shaft for pulley mount bolt, and had elected to just drill new holes and not use the oblong holes. The tail rotor strike was severe enough to bend the pitch pins and that force was severe enough to deform the pulley bolt holes so obviously the tail rotor shaft should also have been replaced, but it was not.
The previous owner made no entry in the log book regarding replacing the tail rotor blades and pitch pins so we did not have any warning to look further until the shaft failed on us. I feel so blessed that this happened when sitting on the ground. Had the fog not caused us to make the decision to turn around and return to Torrance, it could have been a very different story to tell if I was still alive to tell it.Many years ago I was hired to provide flight instruction in an Exec 90 at the Torrance, CA airport. This is the same airport where the Robinson factory is located. As you can imagine, this is a very busy airport with lots of R22 and R44 test flights being conducted on new aircraft prior to delivery.
The new owner of this Exec 90 owned a jet charter service and was an accomplished pilot. He purchased the Exec 90 to see if he had the aptitude to learn to fly helicopters before investing in a certified ship. He was the third owner and the logbooks indicated that only scheduled maintenance had been performed on this helicopter with no damage history indicated. I did notice that the tail rotor blades looked like they had been recently painted due to the lack of paint chipping on the leading edges. This should have raised some concern but at that time it did not register as anything to investigate..big mistake on my part.
We were able to find a hover area away from all of the Robinson traffic and conducted his hover training which he picked up on quickly. After several days of hover training, it was time to take the helicopter to altitude but the traffic pattern was very congested for initial flight training so we elected to fly out to the coast and then fly south to Long Beach where there was less congestion. The flight out to the coast was over very heavily congested residential and commercial development so once we reached the coast and open beaches I relaxed a little.
The first day we flew down the coast to Long Beach and practiced traffic patterns over the Long Beach container port where there was a lot of open space in case we needed to land in an emergency. We made several trips down to Long beach that day with returns to Torrance to refuel.
The next day we planned to repeat our route for more altitude training so we again flew over all of the developed congestion between Torrance and the coast then turned left to follow the coast line south. We could see a large fog bank about a mile off the shore line and saw a few wisps of fog drifting toward the beach area. We decided that if the fog came in (it was not predicted to come in) we could be stuck in Long Beach and not able to return to Torrance so we executed a 180 degree turn and returned to his home airport.
We made our radio calls and made our approach to the taxiway and set down at Torrance. As we rolled the throttle back to idle to talk, I heard a distinctive tic.tick.tic from the tail rotor area of the helicopter. I told my student to shut the engine down as I got out to investigate the origin of the ticking noise. As I was standing next to the winding down tail rotor it suddenly wobbled dramatically and the entire tail rotor assembly from the pulley outward fell off and was just hanging by the anti-torque cable.
Had that happened anywhere else in our flight we would have been in real trouble, God had protected us to have it happen once we were safe on the ground. In the hangar we pulled the remaining portion of the tail rotor shaft out and found that someone had previously drilled a second set of holes in the tail rotor shaft for the tail rotor pulley bolt. The tail rotor shaft now had four holes instead of the two for the pulley bolt.
The two bolt holes that were not being used by the bolt were oblong from an obvious sudden stop like a tail rotor strike. A crack had propagated unseen under the pulley and traveled the weakest route, from hole to hole until the shaft just broke free. Finding this we called the Rotorway factory and inquired about any tail rotor parts sold to the previous owner. They confirmed that they had recently shipped a new set of tail rotor blades and pitch pins to the previous owner due to a ground strike which destroyed both tail rotor blades and bent the pitch pins on both blades.
The previous owner had replaced the blades and pitch pins, had seen the oblong holes in the shaft for pulley mount bolt, and had elected to just drill new holes and not use the oblong holes. The tail rotor strike was severe enough to bend the pitch pins and that force was severe enough to deform the pulley bolt holes so obviously the tail rotor shaft should also have been replaced, but it was not.
The previous owner made no entry in the log book regarding replacing the tail rotor blades and pitch pins so we did not have any warning to look further until the shaft failed on us. I feel so blessed that this happened when sitting on the ground. Had the fog not caused us to make the decision to turn around and return to Torrance, it could have been a very different story to tell if I was still alive to tell it.
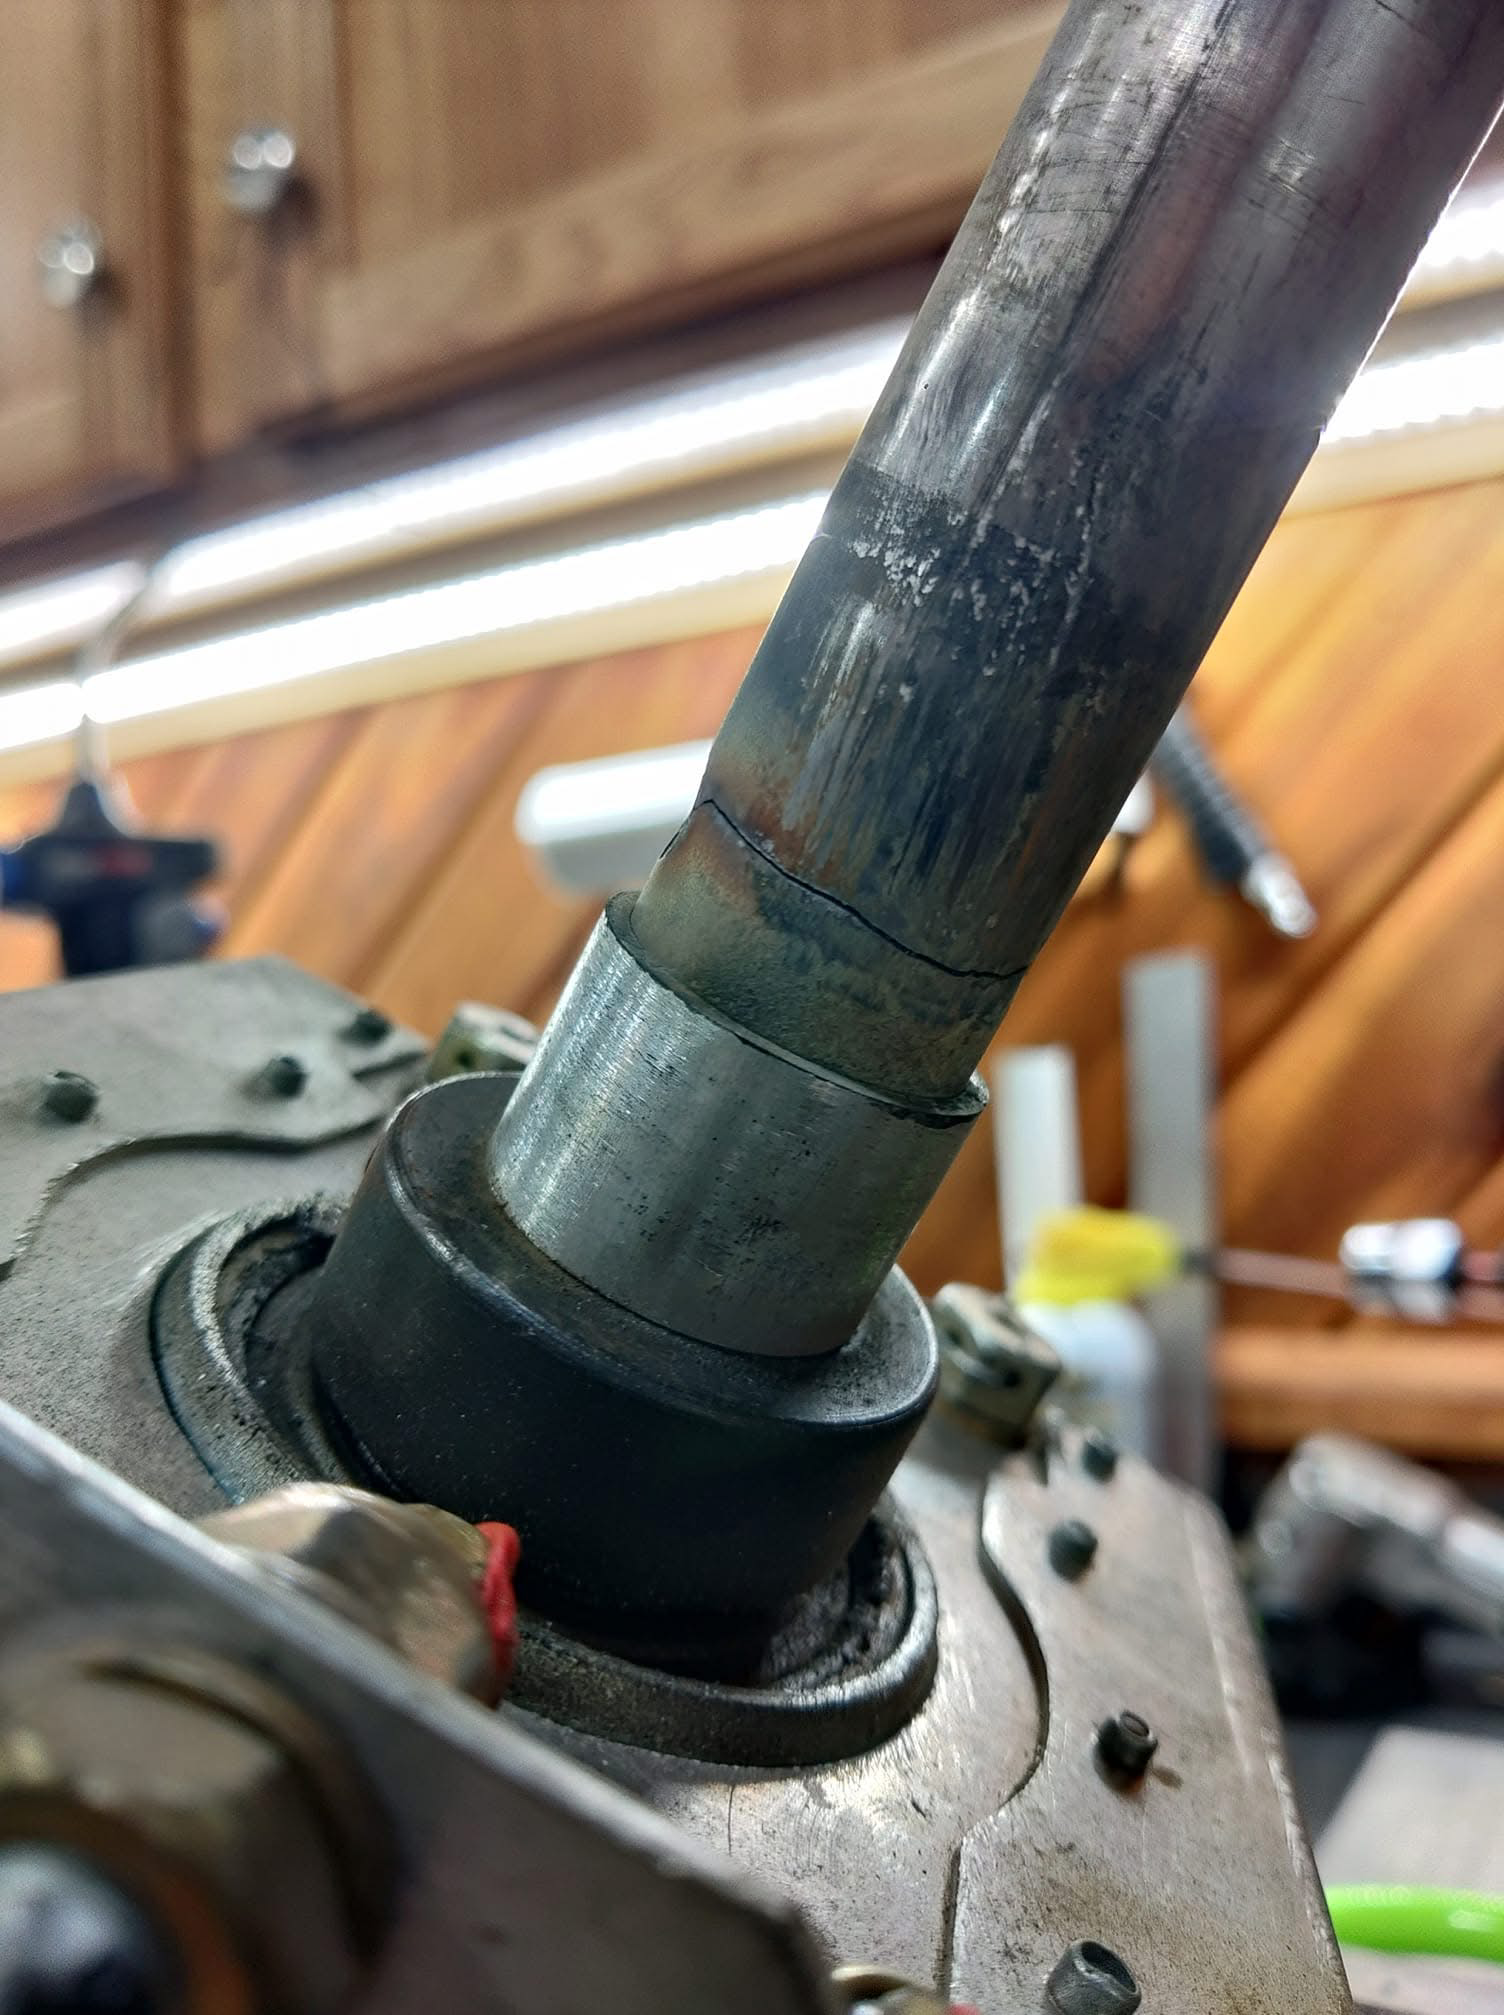
Daniel Meisner posted this photo of what he found on a tail rotor shaft after removing the pulley.
|
|
|
|
|